Overview
- Generate a PKCS#12 private key and certificate file
- Import user PKCS#12 file to the WWPass PassKey secure token
- Configure the Cisco SG500-52(P) to allow Public Key Authentication for SSH access
- Install user SSH2 public key into the Cisco SG500-52
Process
Step 1, Generate a PKCS#12 private key and certificate fileThis step is relatively straight-forward and you can find explanation of this process in another article on this site:
Securing OpenSSH with WWPass PassKey. If you already have an OpenSSH server running with a public key in ~/.ssh/authorized_keys you can re-use this key with CISCO after doing a quick conversion. OpenSSH requires SSH formatted keys while the Cisco requires PKCS#1 PEM encoded keys. Luckily if you are on a server with OpenSSH installed you have access to a handy tool called “ssh-keygen”. To convert from SSH to PKCS#1 key format:
ssh-keygen -e -f ~/.ssh/authorized_keys > ~/ciscokey.pubStep 2, Import user PKCS#12 file to the WWPass PassKey secure token
Like the previous step, this was also covered already in the article
Securing OpenSSH with WWPass PassKey. What wasn’t covered in that article was how to also import a PKCS#12 file to your token using Mozilla Firefox. In order to use Firefox to do the import for you we will need to make it aware of our PKCS#11 Cryptoki library for WWPass. The only prerequisite for this is to install the
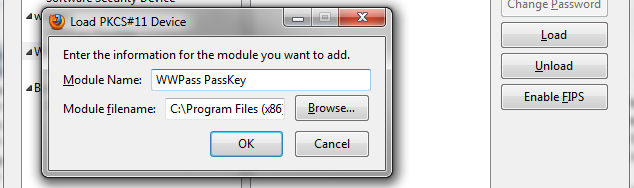
WWPass Security Pack. This software will install the Smart Card Mini-Driver, PKCS#11 Cryptoki library, and the WWPass Dashboard application which is used to monitor the token status and configure other compatible applications for use with the PassKey. Once you have your PKCS#12 file handy you can open Mozilla Firefox and click on the orange “Firefox” tab in the upper left of the window and select “Options”. Now click on “Advanced” in the upper navigation bar and then click on the “Encryption” tab. You will now be able to select the “Security Devices” button. In order to have Firefox utilize our Cryptoki we need to click the “Load” option and point it to the Cryptoki DLL which is usually located in
C:Program Files (x86)WWPassCryptokiwwpass-cryptoki.dll. Click “OK” and it should add a new entry to the list of security devices.
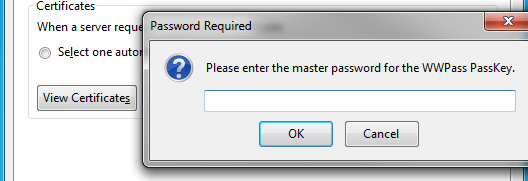
Now that Firefox knows how to use the PassKey token we can begin importing the PKCS#12 file. To do this, go back to the Advanced->Encryption tab in Firefox options and this time select “Certificates”. You will be prompted for your PassKey access code / PIN for access. You will now be able to see your existing certificates list for both the Firefox/Windows certificate stores as well as the PassKey container.
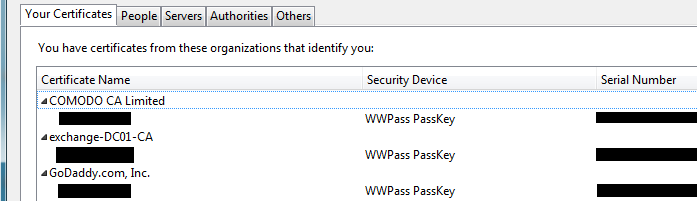
Now click on the “Import…” button at the bottom of the Certificate Manager screen. You will now be able to select your PFX or PKCS#12 file. It will prompt you for the PFX password (just like CertUtil will) and allow you to push that file into your PassKey. The PassKey will have the LED light on the token itself blink while it’s writing the file to the token. That’s it!
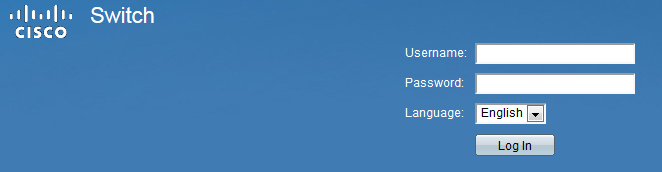
Step 3, Configure the Cisco SG500-52 to allow Public Key Authentication for SSH accessStart by accessing your Cisco SG500-52 or SG500-52P switch via the web interface by visiting https://<your switch IP> in a web browser. Enter your credentials to gain access to the web interface.
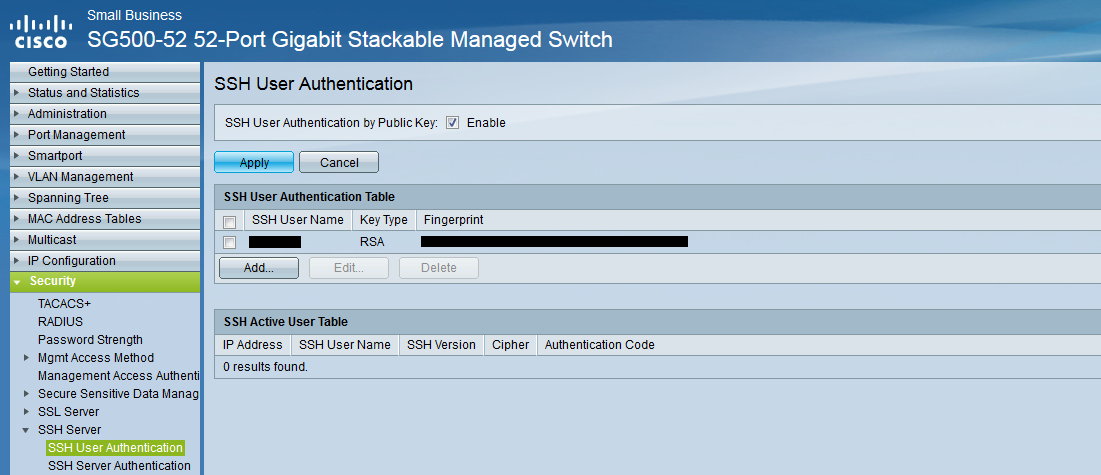
Just as the next images shows, you will need to navigate to Security->SSH Server->SSH User Authentication. This is where you will enable Public Key Authentication for SSH as well as import your public keys for users. Enable the check-box at the top titled “SSH User Authentication by Public Key”. This enabled users to attempt to login using Public Key Authentication. When disabled the Cisco will not entertain such requests.
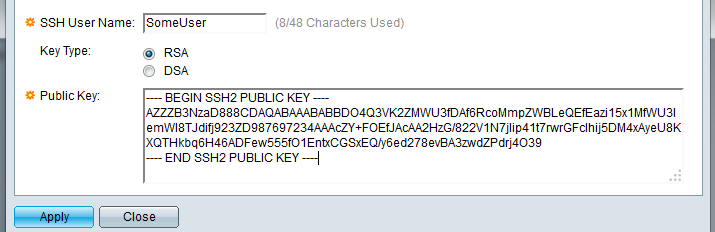
 Step 4, Install user SSH2 public key into the Cisco SG500-52
The last step here is to actually import a user’s public key into the Cisco so it can be used by the SSH server. To do this click the “Add…” button under “SSH User Authentication Table”. Tell the server which user this key will belong to and then paste the RSA/DSA PKCS#1 public key.
Leave a Reply
You must be logged in to post a comment.