
[box type=”download”]
Prerequisite Software
- Samsung ODIN 3.09 (http://android.sc/download-odin-3-09/)
- TWRP2 .TAR (http://techerrata.com/browse/twrp2/jfltespr)
- Google GApps .ZIP (http://goo.im/pa_gapps)
- OmniROM .ZIP (http://dl.omnirom.org/jfltespr/)
Transferring OmniROM to your phone storage
Hook your phone up to your PC with a USB cable and place the latest OmniROM .ZIP file in the root of your internal/external storage folder. While it’s not 100% necessary to place it in the root storage folder, it is recommended (for reasons beyond me, but it’s best not to chance it I suppose). Further help getting started with transferring files can be found in this Google Help article. If you want to use Google GApps on your phone, you can also transfer Google GApps .ZIP to your storage for later installation.Installing TeamWin TWRP2
Power off your phone. Once powered off, press and hold the [HOME]+[POWER]+[VOLUME DOWN] buttons until the Android logo appears. The screen should now tell you about Download Mode and that you should press [VOLUME UP] if you want to continue. Once in Download Mode, connect your phone to your PC via USB. Extract the ODIN .ZIP file you downloaded and run ODIN as an Administrator in Vista/7/8+. ODIN should show that your device is connected by showing a blue object under ID:COM and displaying a message about adding the new device in the “Message” section. Click the “AP” button and browse to your TeamWin TWRP2 .TAR file and press Start. This will install a new recovery application (which we will later use to actually install the new ROM).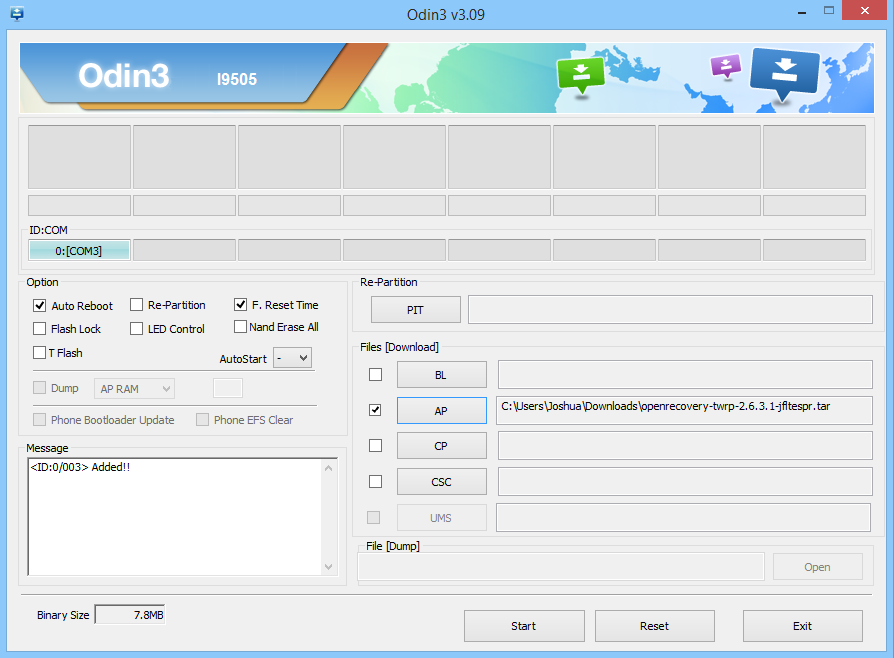
Backing up your factory ROM
It’s a good idea to perform a full backup of your files/ROM before continuing. To get started, enter recovery mode by pressing and holding [HOME]+[POWER]+[VOLUME UP] buttons until the Android logo appears. You should now see the menu for the TWRP recovery application. Select the Backup button to start the process. You can find a quick blurb about what items you may want to backup at TeamWin. My only real recommendation here is to backup your data to an external SD card if possible.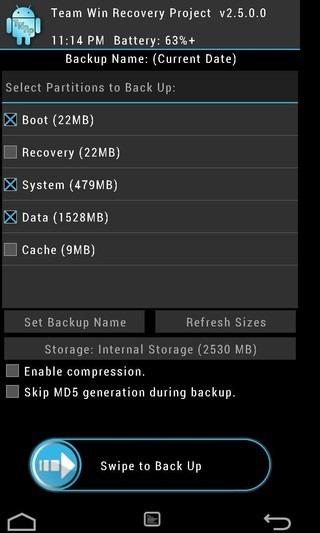
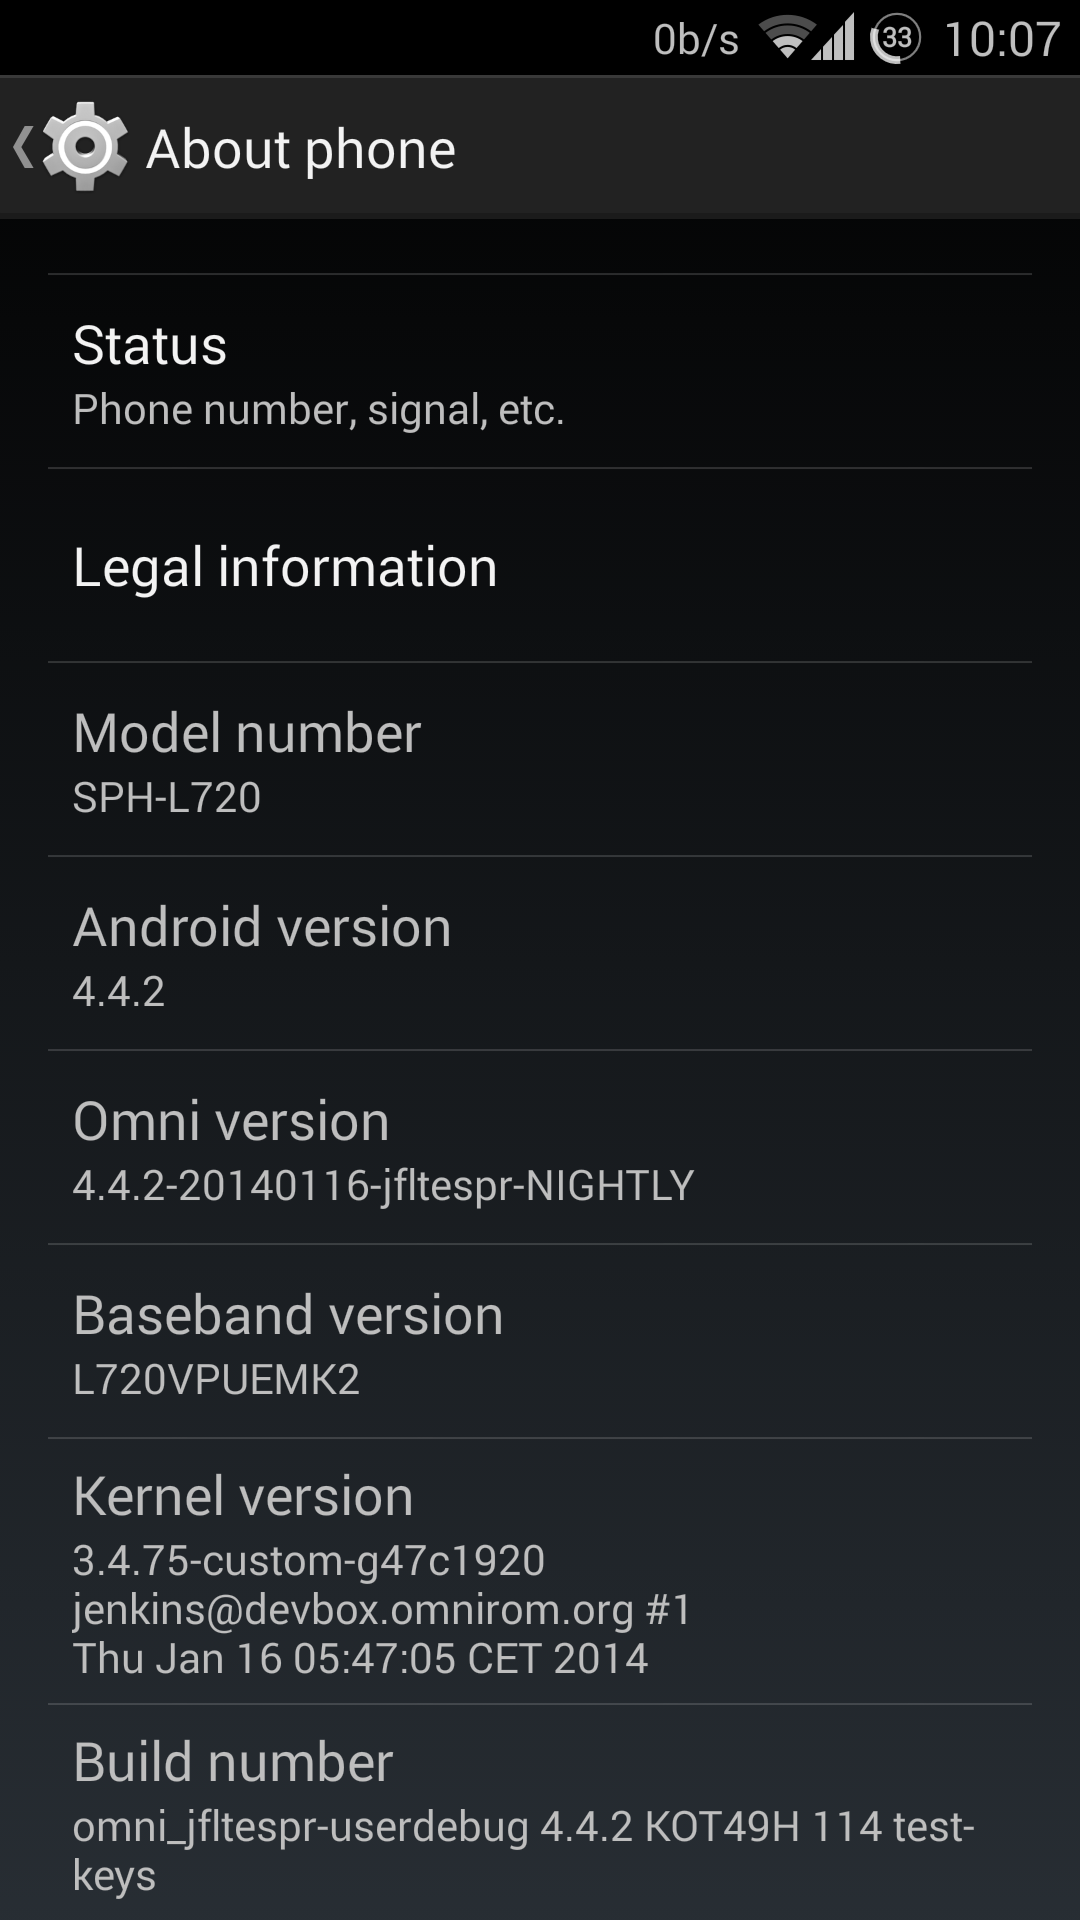
Installing Android KitKat 4.4.2 [OmniROM]
Now that you have a recovery application installed, it’s time to enter Recovery Mode. Enter recovery mode by pressing and holding [HOME]+[POWER]+[VOLUME UP] buttons until the Android logo appears. You should now see the menu for the TWRP recovery application. Select the Install button and you will be prompted to find your ROM. Go to your storage root and select the OmniROM .TAR ROM and then swipe to confirm flashing of the ROM to your device. This will take a bit of time so please be patient (or whatever you do, do NOT power off your device during this process). You can also install Google GApps at this point. I recommend installing the full package but you can really do as you please depending on how much Google apps you really use. Same process as installing the ROM. Optionally clear the cache after installation and then reboot into your new ROM.Say hello to your new S4 running Kit Kat
Leave a Reply
You must be logged in to post a comment.